Pages

Tuesday 26 April 2016

April Swap

Long time since I have entered an ATC swap so I really enjoyed this one.   The theme was April Showers.
I used a Lacy Sunshine image for this swap, I love all her images so was really pleased to use this one.
 I coloured her up some time ago using pencils but added some pale blue Biro to the puddles, just enough to brighten the picture up.  I inked up the edges of the card, blue at the top an green at the bottom.  I edged the PC printed sentiment in pink and added it along the lower edge.


I received this absolutely great card by return.  Doncha just love this drawing?!  Makes me smile every time I look at it!!

Thank you Olive.

Sunday 24 April 2016

April Swap

I decided to use up the decoupage I brought back from the Crop, kindly donated by Shazsilverwolf.
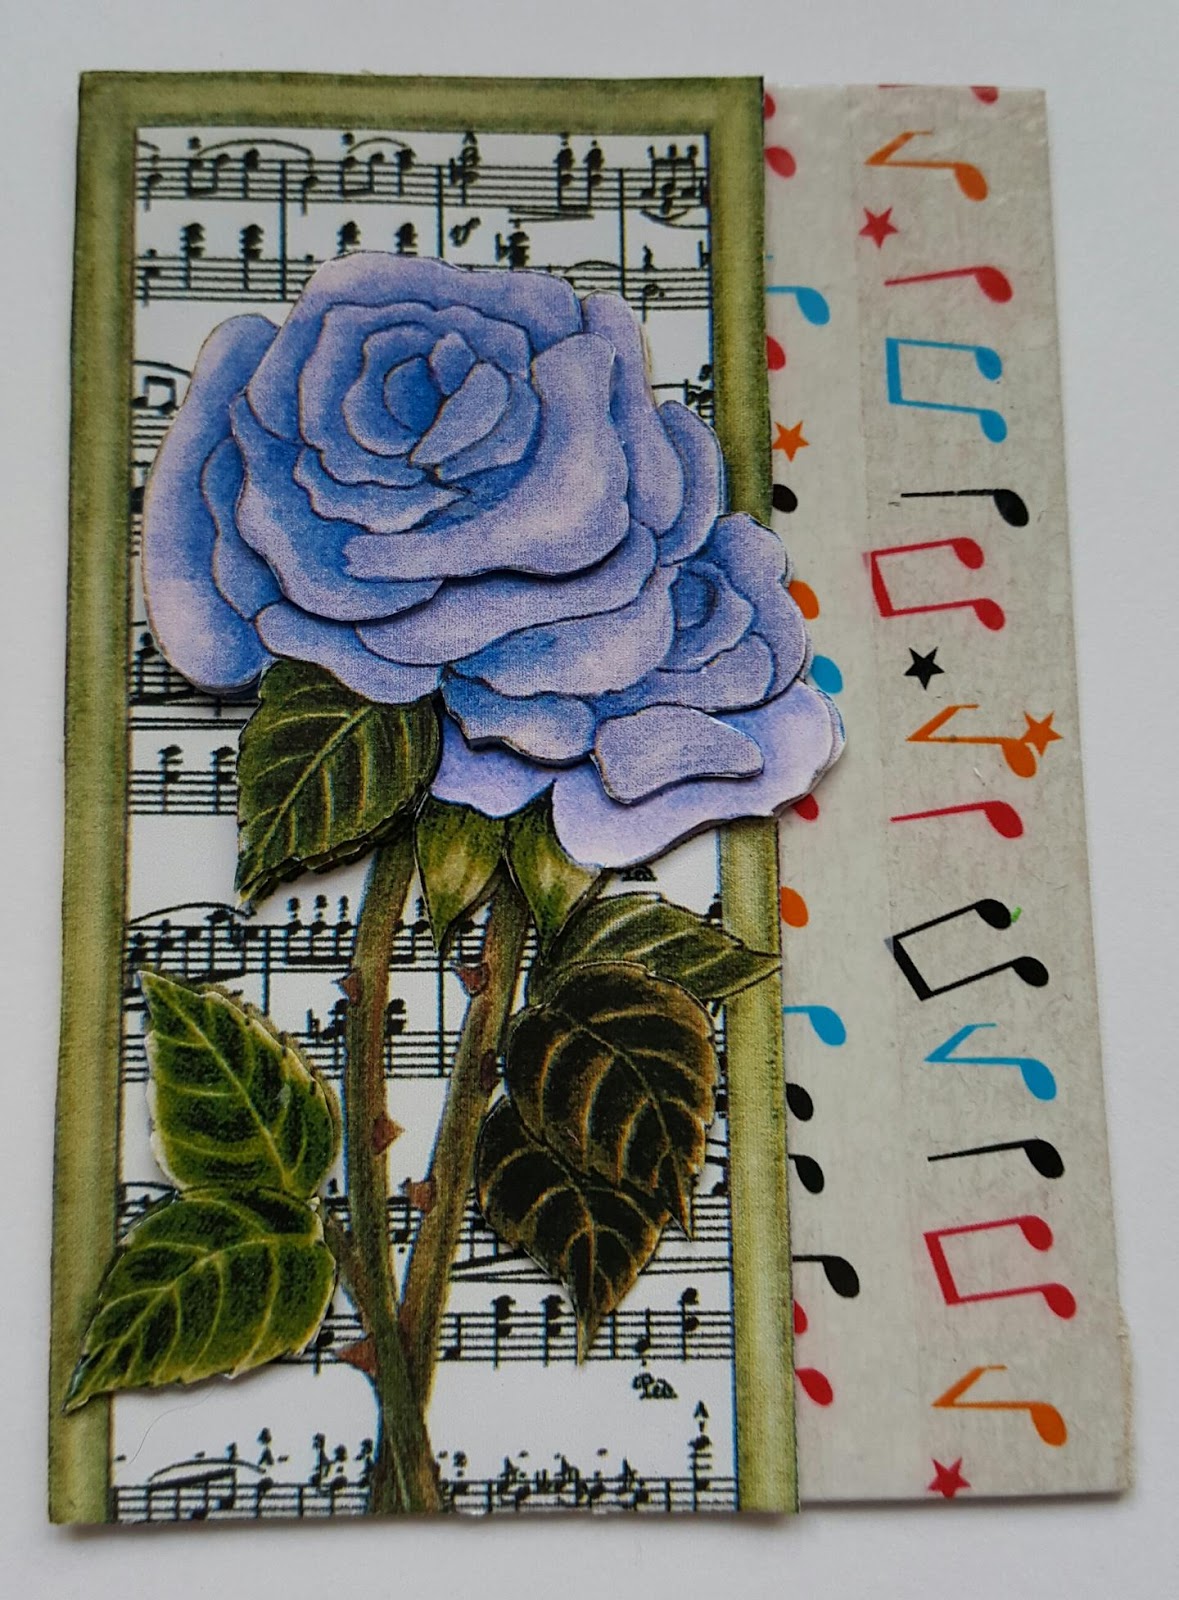
I added some washi tape to the edges of the base card and then attached the decoupages.

Daisies

Roses


Lilies
UPDATE:

Thank you SueF for the following cards - 

 
A very pretty tag.


An elegant ballet dancer.


A very modern watercolour.

Monday 11 April 2016

Silhouettes Swap

Time to use up some of my cards!  I made these cards several years ago, well, actually the other card has a green die cut silhouette.  When I queried if it was acceptable, I was told that the theme was black silhouette so I had to abandon it and make some more cards.


The original cards had black diecuts on an acrylic abstract background, so I cut some new canvas to size and painted it up.


Now this shot is not very good as you can't really see the silhouettes - they are there though!
A small black dog with his nose to the ground ..... looking for the bone!


For the next card I used blue and green paints as I was using two black birds silhouettes.

Good cards and soooo different!

Sunday 10 April 2016

Crayon Rubbings

I used a Steampunk mask/stencil for this swap.  I thoroughly enjoyed myself making the backgrounds by rubbing my crayons on ordinary printing paper over the stencil.  I know that I would be embossing cogs to go on top so I only used 'metally' colours.  Once I had the paper coloured I cut out the ATC pieces and attached them to base cards.  I cut out the cogs and chains, embossed and inked them as in my Cardius Bloggus post.


I added some embossed chain links and fancy cog along with a PC printed sentiment to this card.


I felt the pattern on this card was too 'pretty' to cover up so added a small cog and placed the sentiment on a 'plain' part of the card.


This grey card 'cog' was coloured using Distress Inks, big and beautiful!
Another PC printed sentiment along the lower edge.


Would you look at the brightness of this 'cog'!!!  Distress Inks on Balsa Wood! What a difference!!  The colour fair knock you out!
Another PC printed sentiment added to the lower left corner to finish.

What a lovely swap this has been, I have enjoyed adding all the different elements and the crayons rubbing was the best.
UPDATE:
Everything became very difficult for our Host and we have had to wait several months for our returns but send them he did ........
 
Flowered crayon rubbing background.  Think this looks like a dreamcatcher.
Thank you Patty R.

Looks like diecut negative has been used for the background.  Ingenious!
Thank you sarat.


The background appears to be the top of a flour sifter.  Another ingenious one!!
Thank you Rosa.

Saturday 9 April 2016

She's a (Vintage) Lady

The Theme is Vintage Ladies but with a twist - one has to have a hat, one has to have flowers and one has to be in a swimming costume!!!
I used one of my Mother's postcards for the hat picture, the others I found on the web.  I wanted to frame the images, so that was my next find.  Then I needed embellishments.  Once I had all my ingredients together I started off.


I used a frame from my kits and coloured it grungy pink/brown and chose a matching pink washi tape to place along the edges of the base card.  I centred the image and frame on the paper and then used a piece of paper lace, using a promarker to colour it brown ... ish!, along the top and bottom of the card.


I used a card from the kit for my next frame, cutting a (not very good) square out of the centre.  I edged this card with washi tape in cream and then added the image and frame.  I placed a brown/cream bakers twine along the lower edge of the card.


This black and white picture of a lady in her bathing costume is one of my favourites. 
I added an intricate red frame to this image but felt it needed something else so ....  I punched some red and cream flowers, put them together and added along the lower edge of the card.  
A small black/silver butterfly alighted on the left side. 


This image is very bright so I wrapped the edges of the card in a plain cream washi tape and then centred the image.   I added some diecut letters along the lower edge. 

I have completed another card but was not very satisfied with it so that one will wait for another time.

Friday 8 April 2016

Art with Doilies

I have lots of doilies, tiny, small, large, white, coloured - lots of them!!!  By the way .....I have made several 'tear outs' from magazines.... before I recycle any paperwork I have started searching through the pages looking for sentiments, and then tearing them out.

For my first card I used a purple highlighter to paint the background of my card - Nice and Bright.  I added different coloured doilies in decreasing sizes down the left hand side of the card and added one of my tearout sentiments in the lower left corner.  These first ones are taken from the Heart Foundation magazine...... after my scare last year I just love this magazine.  It is informative, inspirational and best of all .... it's free!!!  I do donate regularly either in goods or cash cos I love this mag so much.


A folded red doiley was my choice for this card.  I adhered the doiley down one side of the card and then folded over the unattached part so that I now have white and red doilies!!  The corners were filled with the leftovers from the green doiley on my first card and then I edged all the tearouts with highlighter pens and added them at angles across the card.  


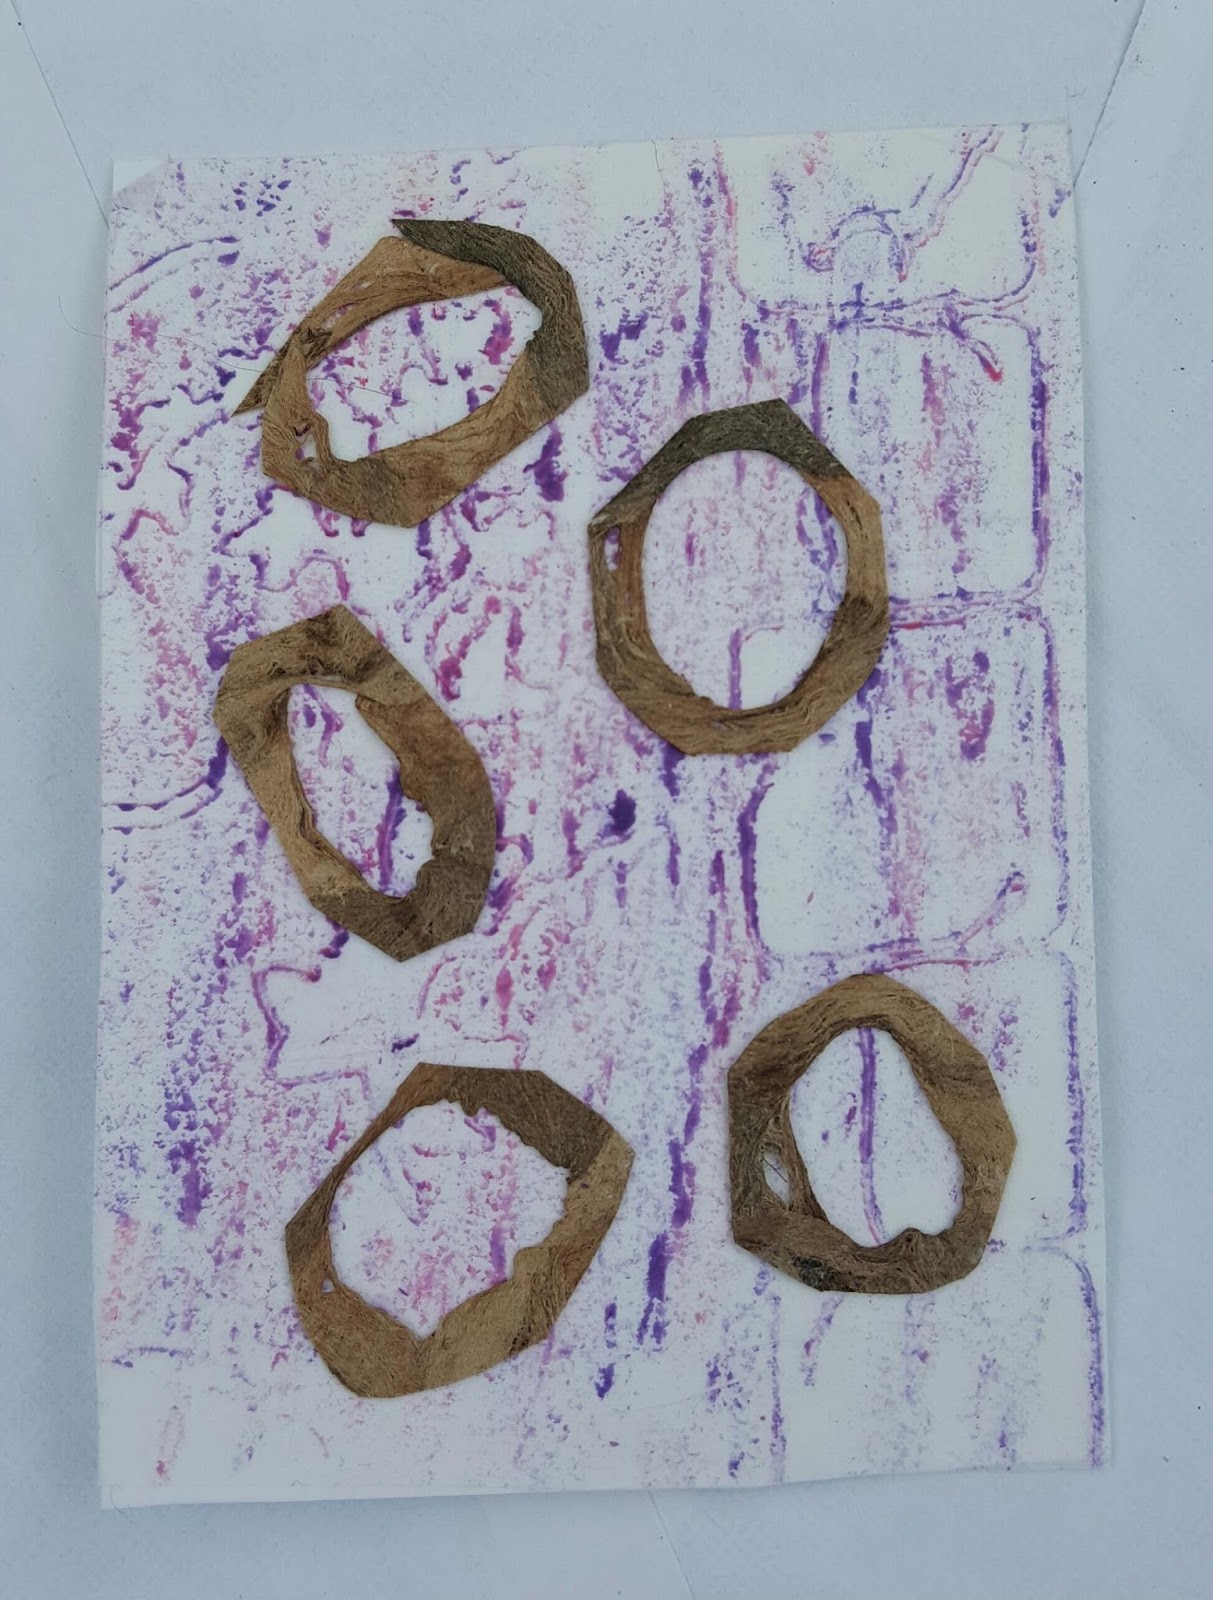
I used a pink doiley for this card placing it halfway across the card which I turned horizontally.  Some punched flowers, red and gold, were placed along the top edge, then I spread some gesso over the flowers and put the card to dry.  When the card was dry, I used a sponge and pink/purple to paint over the gesso and down the sides of the card.  I used a torn vellum sentiment along the lower edge of the card.

This card is my favourite.  
I used a piece of wallpaper as the background, and then folded a lemon doiley to make a skirt on a diecut dressform.  Once the paper was dry, I cut out a bodice from an edge of the left overs and then adhered the dress form to the card.  I used a printed sentiment for the top left edge.

Once all the cards were dry, I used my promarkers in matching colours to edge the whole card.

UPDATE:
I received the following cards - 


The doily has been placed over a stencilled card.
Thank you Castlequeen5.


Very clever painting using the doily as the leaves.
Thank you houli.


Many layers used here: brown paper, doily, image and sentiment.
Thank you Londonont1. 


WOYWW #772

  WOYWW - All the deets on how to link up etc. and, more importantly, why you should, can be found at the top of the page.  Thank you Julia ...