Pages

Friday, 30 September 2016

Ballpoint Pen ..... again!

I did so enjoy my last Biro swap, I enjoyed creating and the returns were wonderful, so I was definitely joining in with this swap!

More cards I created on holiday .....

First card was the inevitable tree!  This tree was going to be the focal point and have just a plain background.  Several green pens going round in circles gave me leaves of varying colours and shapes.  I edged the card with inkpad tapping in colours.


Then I was sort of  .... no mojo!  

I sat there and then into view sailed several boats ......
I am very pleased with the way the blues coloured the sky and the sea - bit of purple in at sea if you look closely!!  Edged with a blue inkpad.

 
By this time the sun is going down ..... The sun ......
I tried to keep this simple .....edged with inkpads to match the various sections.


Off went my mojo again!

What could I draw for my fourth card, usually the Hostess card ..... That's it!  
R for Rose.  I don't know if the roses are very life like but .... my interpretation!  I used a rainbow inkpad to edge this card.
this is turning out to be a really good holiday!!!!

Thursday, 29 September 2016

Fall Foliage

Superb Autumn colours ... that's what I am thinking after I read this theme.
I had no idea as to the designs but I was going to watercolour the cards...... definitely.
The idea for my first card came to me as I lay awake in my bed one night.  I was listening to the rain..... in the dark..... and the idea popped into my head ..... an umbrella in the rain over the fallen leaves!
I took all the cards and paints away on my holidays with me  ..... if it rains then I have something to do....
It didn't rain .... but I did spend a day in the chalet ...... painting!!


I lightly sketched out my design and then started to paint in the details.... the grey sky, the blue umbrella and then the wonderful autumn leaves.  When I came back home I added the rain drops using a white watercolour pencil.


While I waited for the grey background to dry I painted in the background for my next card.  This time I went darker, a really dark night this would be.  I had seen a birthday card on Pinterest where the background was black with bright leaves popping.  Once the background was dry .... I painted in the leaves with white paint and then added the colours.  
When I arrived home I added more details with my watercolour pencils, brightening up the colours of the leaves.


After I finished painting the leaves on both cards, I painted a background on my third card with the idea of using diecuts from this background.  
When I arrived home, I couldn't find a die that I liked so started to sort through my stamps ..... I found a big leaf sponge one ... that's it, I would heat emboss this leaf!!  I used some clear embossing powder and kept embossing until I had a thick covering.  

I found out some Steampunk background paper from when I was making the backgrounds swap.  I had brayed some acrylic paints onto paper and then stamped Steampunk leaves and gears with Versafine Sepia ink.  It was the right colour and when I looked at it closely ..... If I cut a card shape at the right section, it will have a leaf centre point.  I cut out the card from this paper and then highlighted some of the gears etc. with my watercolour pencils.


I am very pleased with these four cards, maybe they are not all watercoloured but I think they are beautiful.
UPDATE:-
I have received these great cards.


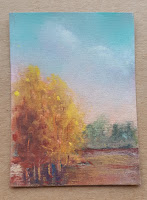
Beautiful pastel drawing.
Thank you Crafty3790


Very clear geometric leaf.
Thank you PatJ.


Gorgeous soft pastel, I LOVE this sooo much.
THANK YOU Bunnymther.


Our wonderful Hostess, CastleQueen5, sent me these 'leaf' diecuts as a thank you.
Thank you for a wonderful swap.

Wednesday, 28 September 2016

WOYWW #382

This is What'sOnYourWorkdeskWednesday - if you want to find out more then checkout the WOYWW tab at the top of the page - and our thanks go to Julia for hosting this weekly meet up.

Back safely at home, the desk has been used and is, at the moment, a dumping ground.  I am preparing to start a Beatrix Potter swap - I have some Royal Mail Postage stamps and some printouts of some backgrounds.  Wouldn't you know that after I ordered the stamps, I found some stickers that I could've used!
So here's the desk ....
Some stencils, postage stamps, printout, stickers, feathers and some wall paper pieces.
I collected the wallpaper yesterday from B&Q ..... DDC was Choosing paint so I wandered off with Little Soldier and found some interesting wall paper, dogs, birds, Winnie the Pooh, you know how it is.....
.... I am hoping to using the wallpaper chart book as a journal for Little Soldier as he loves animals at the moment.
The feathers were collected when we visited the Bird & Breakfast to bring the chickens home.... waste not want not .....

Talking about B&Q .... see the stencils ...... £5 .....and there are two pattern sheets in that packet!!


That's my desk for this week, hopefully I will be able to visit a few more fellow deskers this week, nothing to do etc ..... ha!!!


Thank you to my visitors last week, very pleased that so many of you appreciated the back view!!  

BTW
PJ's wineglass changed over the week ..........

Sunday, 25 September 2016

September Colour - Pink & Lavender

Our lovely Hostess enclosed an embossed perfume bottle image in her Christmas card to me and this is the month I get to use it!

Here it is .....

I used a pink purple background paper and second generation stamped it with pink and purple inks.  The image was popped up on 3D foam and I added borders at top and lower edge.  The borders were made from nail decoration bought from a door to door company several years ago!  I laid some glue along the edge and tipped the tiny balls over as though they were embossing powders.  A torn PC printed sentiment along the lower half completed the card.


I painted some glitter nail varnish over this background paper but left the lower corner empty.   I used a die cut frame to spotlight the plain area.  I needed a really 'good' sentiment for this card, one that would balance the the frame..... fund it in a magazine.... and so apt.


This little owl is just soooo cute!
I sorted out some 'owly' paper to use as a background, and after attaching it to the base card, used my corner punch to round the corners.
After I had added a line top and bottom of the card, I found an absolute brilliant sentiment!  
He! He!
Just LOVE it!  He! He!

I have received these great cards:-


Felt! Never would've thought of using that.
Thank you Barbara.

Sparkly embossing and diecuts.
Thank you Liz.


Diecuts on a pretty background card.
Thank you Philippa.


Saturday, 24 September 2016

September Theme - Vintage Ladies

I knew that this swap was coming up as our Hostess had included an embossed image in with her Christmas card.

 I used one of my Magazine free stamps to double stamp the lady, once on plain paper and one on background paper.  I painted up the plain image and fussy cut it to sit over the background image.  I then added a sentiment cut from a free paper.

I used some free paper (from a different magazine this time!) as a background and added a lady from a sticker sheet.... some beautiful vintage ladies on this particular sheet ...... wish I could remember where I bought them!  I outlined the image with black gelpen and also the sentiment, again torn from a paper.


Sometime ago PJ bought me a book of card cos he liked the colours but, when we opened it up at home, it was papers.  Ah! Well!


Today I used one of the pink papers because I found some pink photo corners, came free with an order (betcha thought I was gonna say Magazine!!).
i used the beautifully embossed image sent to me at Christmas as the focal point.  The sentiment came from a paper again but cut straight as a title.  I am rather pleased with how these cards turned out.


I received the following cards:-


Beautifully stamped.
Thank you JanS.

Matted with black and adorned with flowers!
Thank you JanW.


Wonderful collage.
Thank you Mel.

Wednesday, 21 September 2016

WOYWW #381

Thanks to Julia for hosting a great get together although I may not visit many desks this week (just a tad busy you understand!)

A new week dawns and once again we are in foreign climes - not foreign as in 'over the water', although we did see plenty on the way down - we are on the south coast.  

This morning this is my view, I jut love it!  
This year the bushes have been cut back a bit more and the hedge is neater so we get more of the view.  As time moves on the fishing boats can be seen returning to the local harbour and a few leisure boats, yachts & container ships  travel across the view ..... It's all go round here!!
We usually hang around base and then catch the local bus into the town and from there ..... spend a very wasteful, lazy day .... hohum!!


....... this was my early morning visitor.  

Woken from a dreamless sleep (I wish!) by the sound of his family calling out to one another, I was surprised to see his audacity - I will not be feeding him!  
I don't know if he will hang around in hope but this is a 'no hope' kind of place .....


.....and this is the 'desk' view first thing in the morning.  
You will have noticed of course the the ATCs are there, even the Biros made it down with me - next week you will be able to see the finished ones!! 
I have brought a few paints with me just in case we have a bad weather day and stay in, I am nothing if not positive!!!

I hope to post a few more views over on my Recollections blog but we will see ......

Have a good week, thank you to my visitors last week.  I did manage to visit a few deskers and I will try to get to visit a few more whilst I'm down here ..... but don't hold your breath. lol

BTW   This is 'behind the laptop' view!!


Wednesday, 14 September 2016

WOYWW #380

This is What'sOnYourWorkdeskWednesday - if you want to find out more then checkout the WOYWW tab at the top of the page - and our thanks go to Julia for hosting this weekly meet up.

I am still organising all my stash, I removed another bag of 'rubbish', three more boxes were chopped up and a teeny tiny bit more space cleared in my studio.  As I stand in my room and look round, it appears to be just the same mess, chaos, jumble, call it what you want, it don't look much more different from when I moved my stash into it!!
But you're here to see my desk ....
I am changing food tins into pencil/pens/brush containers.  I have covered one of my catfood boxes and am now filling it with these decorated tins .... it's taking some time as we don't eat much tinned food, I like fresh .... or as fresh as I can buy from a supermarket!!!  I need another two and the boxes will be full and then I can find all my writing, painting, brushing implements in one place!
As you can see, in the lower left is the Biro drawing and the other cards - still waiting to be completed.
I have posted out some cards this week, but they were completed before the move.......

Today I am looking after Little Soldier on my own today as PJ is over at the new house with SIL erecting a new BBQ .... yes, erecting it as it is humongous!  It has been kindly donated to them, well, to us .... but it is far too big for the two of us so it has another home.  

Today we will probably have a bit of this.....  


.........and maybe some of this .....


.... if the temperature climbs up into the 20°Cs then we will definitely be inside. 

Happy WOYWWeek everyone, lots of hugs and laughter.

Saturday, 10 September 2016

Background Technique seven

Technique seven was me getting down and messy!!!

I applied several shades of brown acrylic over the yellow card with my Brayer and left to dry.


Using my honeycomb stencil, I added some golden brown with a sponge.  I wasn't happy with this effect so applied the stencil again and pushed some deep yellow paint through the stencil with my finger ...... much better result!  
I now realise why Mixed Media can be messy!  lol

Friday, 9 September 2016

September Swap

I happened upon a striking picture while smurfin Pinterest............ sorry, I didn't keep the link.

I spent some time trying to work out how to make it into an ATC so, appreciating the fact that I cannot draw, I decided to use stamps.  I spent some time trying to work out exactly how to achieve the result I wanted ... so here I go.....
I used a Versamark Sepia ink to stamp with and stamped my images on a large sheet of sketch paper.  In order to achieve the opening I needed to stamp the image on the fold, especially the head!  As you can see, I spent a lot of time stamping images.  lol

Eventually I managed to get my stamping just right so I fussy cut out the heads of each image, careful to miss the fold ... 
... Now to choose a background, the position of the image, the sentiment ....

A long time ago I was promoted to IT Manager and two days later one of the printers in the office spewed out gibberish - nicely printed gibberish so I kept some of the papers ...
...... waste not want not!!
I am using a sheet of this paper for the background to the paperboy stamp in the centre of the photo.  The other two backgrounds are from my latest swap leftovers.


After fussy cutting one side of the image, I edged it with the sepia ink pad and attached it to a piece from one of the backgrounds.
I cut out the words included with the stamp and placed them on the inside of the folded head.
I think this one is an easy success story!  


This young lady caused me a problem as to what to put inside her head, but then I looked at her headdress and decided a touch of colour and gold would make it look a bit Christmassy.
I fussy cut her out completely and attached her to a piece of the paper left from my spraying and painting of the backgrounds.
After spending some time trying to size the sentiment small enough to fit inside the head, I managed to complete the card.  I outlined this image with some sepia ink.

After attaching the typing paper to the base card and fussy cutting the paper boy, I broke for lunch ... and a brain storming session with PJ for a quotation to go inside the head.


Back at my desk, I attached the image and outlined him with the sepia ink.  I printed out the sentiment and attached it to the inside of the little boy's head.

I do hope that my partner likes these cards, they are a bit different but .... that's me!!!

Unfortunately only the envelope arrived, the cards are missing .......hope the Royal Mail enjoys them!!

Received some great swaps today.


Acetate on this collage I think.


Beautifully collaged with stamps.


Another beautiful collage, super 3D.


All the cards arrived tucked inside this card - doncha love it?!!!! 


 Thank you Mel for being my partner and for a great selection.

Thursday, 8 September 2016

Background Technique five and six

Technique five is listed on UKATC Group's Background technique as 'Tie Dye'.

I was determined to try this as I now own a few Distress Inks and Sprays so would be able to follow the instructions .... I'm a visual learner so written instructions have to be followed to the letter!


I found a plastic sleeve - one of the thicker, open on two sides ones -  and opened it out on the 'spray catcher' paper.
I sprayed onto the surface and then closed the sleeve, gently squishing the colours.  
I do hope you are enjoying all my technical terms.... I just love the words, smooshing, squishing.... 


I placed my cards close, ready to insert into the sleeve as I wasn't quite sure about this next step.
I placed TWO pieces of card on the lower surface and closed the sleeve and pressed gently, moving some of the colours around.  I removed these cards and placed a third card inside to collect up the remaining colours.

I have two usable backgrounds which are much brighter IRL (in real life).

Technique six  was me trying to be clever.  


I swished a thick layer of Gesso onto an A5 white card and then sprayed it with a red mica spray. 
It looked boring so I wiped a mark maker across it, I am not sure whether this was an improvement or not.

After it had dried, I decided it looked decidedly yuk! and insipid but, before I moved it, I gave it another coating of the red spray - big improvement!  I stencilled some pink flowers on one half and spritzed some copper on the other half.

WOYWW #777

  777 . . .  Used to be the dialling code for our area . . . . . .  just saying! The Desk Bit boring but I am 'shopping my stash' at...